Selecting Quality Neurons
Your chances of achieving successful patches increase if you do a good job at targeting healthy neurons. Quality neurons appear flat and have crisp borders. Smaller shriveled neurons (which often look more 3D than the rest) are typically sick.
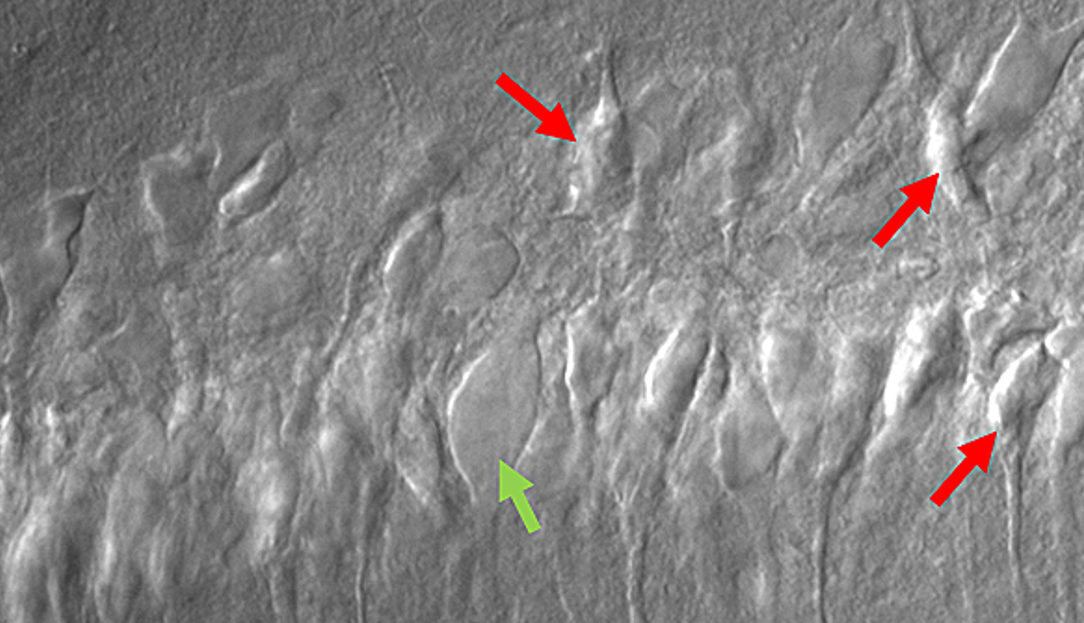
Figure: Examples of good (green) and bad (red) neurons for patching. This example image uses DIC optics and was taken in the CA1 layer of the rat hippocampus.
Managing Pipette Pressure
Positive Pressure
Apply positive pressure by blocking the exit path and pressing the plunger.
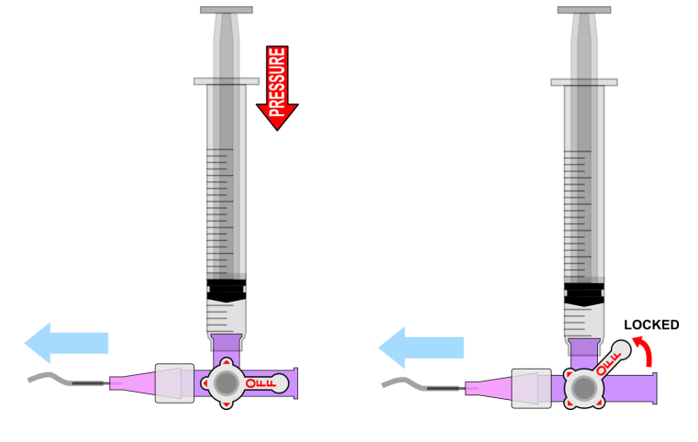
Suction
Before applying suction open the exit path to allow positive pressure to escape. Then block the exit path and lift the plunger slightly.

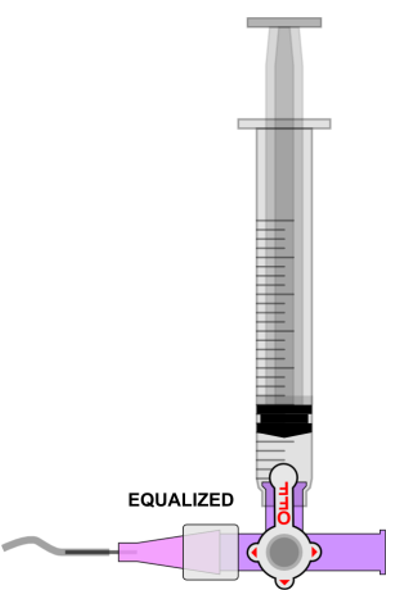
Zero Pressure
Open the exit path to equalize pressure.
Steps to Patch a Cell
The borosilicate glass of the patch pipette will stick to the first lipophilic substance it touches, so it is critical that the first thing to contact the inside the tip is the membrane of the neuron to be patched.
Step 1: Approach
The goal of this step is to move the pipette near the target cell. Positive pressure is maintained to continuously eject pipette solution and prevent debris from entering the pipette tip.
-
Position the pipette: Set positive pressure (1-2 psi) and lock the syringe. Move the pipette as close as possible to the target cell but leave it several microns above the surface of the brain slice.
-
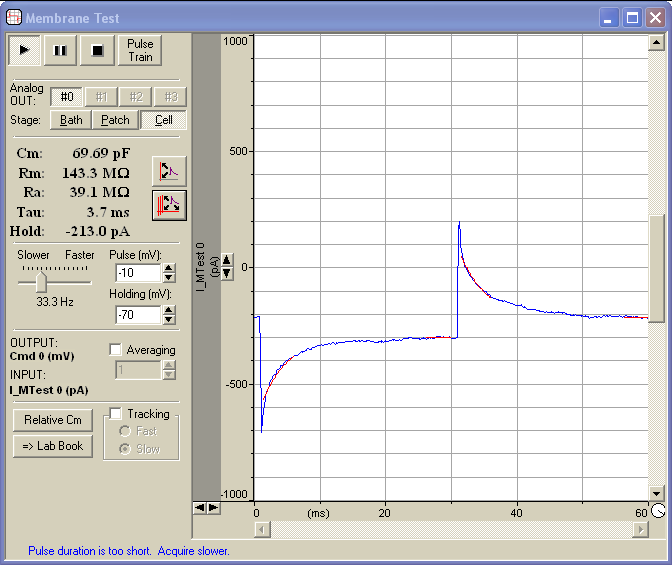
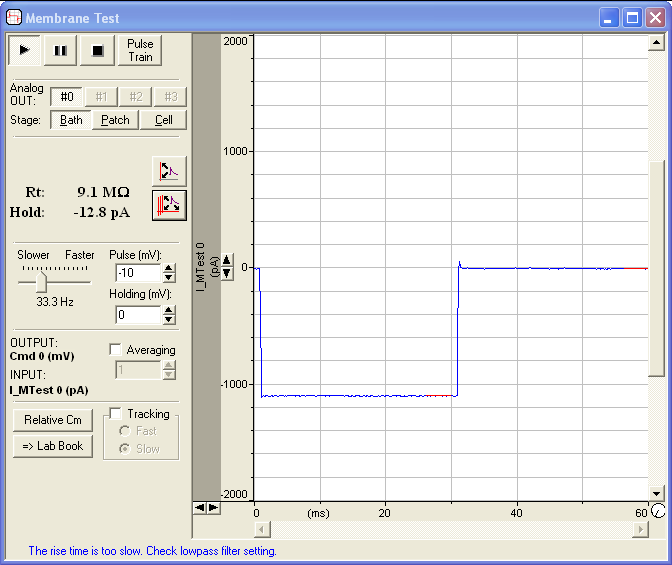
Zero the pipette offset: Click the
bathbutton, press ⏸, and the line should go flat. Now click 🔓 andauto, and the line should be centered at zero. Click the ▶ button and a square shape should appear.
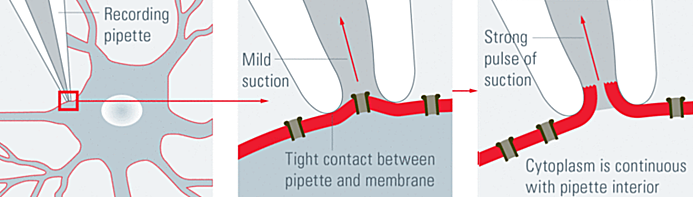
Step 2: Seal
The goal of this step is to suck a small piece of membrane into the tip so it forms a tight seal with the glass of the pipette.
-
Move the pipette tip into the tissue and observe a pressure wave expanding the tissue around the tip, verifying that your pipette is not clogged.
-
Push the pipette tip into the cell until you see a growing dimple expanding indicating that the pipette is pressed into the cell

- Quickly release pressure, apply slight suction, click the
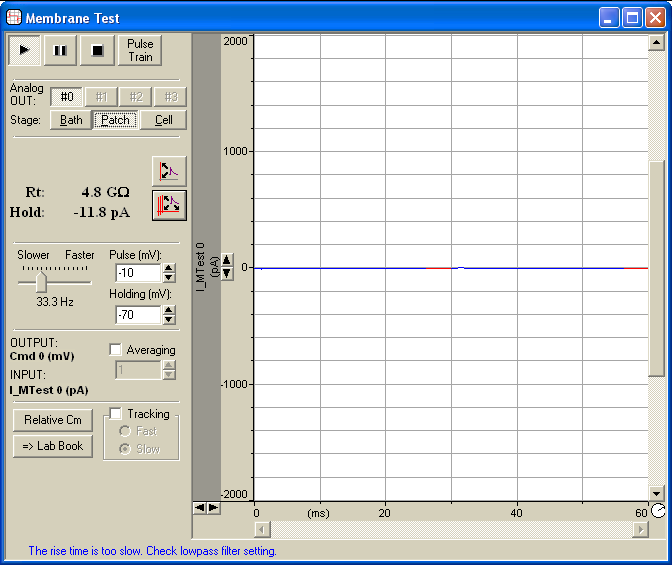
patchbutton, and allow the seal to form. A quality seal is marked by the line quickly becoming flat and the reading indicating Rt is >1 GΩ
Step 3: Break
-
After a GΩ seal has been achieved, apply suction until the patch of membrane covering the tip of the pipette ruptures. When this happens the flat line will change to one with two sharp curves.
-
If the seal does not easily break, click the
zapbutton a few times to deliver200 µspulses while applying continuous suction -
After breaking-in immediately release the pressure to prevent too much of the neuron from being sucked into the pipette
-
Click the
cellbutton to evaluate access resistance (Ra). Apply additional suction in short bursts as needed to ensure Ra is as low as possible (typically around 20 MΩ).